Unlocking the Potential of Your Tesla Level 1 Charger
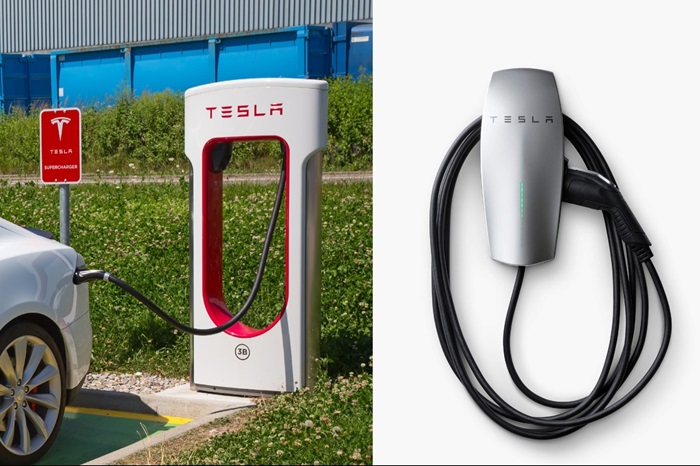
The Level 1 charger, standard with every Tesla vehicle, is often underestimated. While it may not offer the blistering speed of a supercharger, it remains a valuable tool for everyday charging, particularly for those with access to consistent home power.
This essay explores the potential of your Level 1 charger and offers strategies to maximize its effectiveness.
What is a Tesla Level 1 charger, and how does it work?
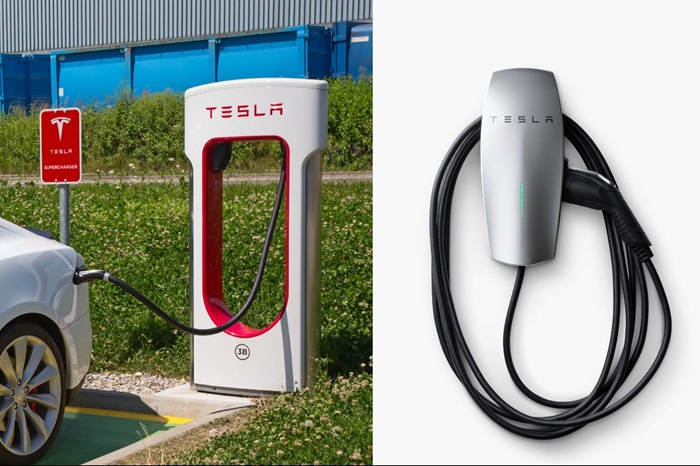
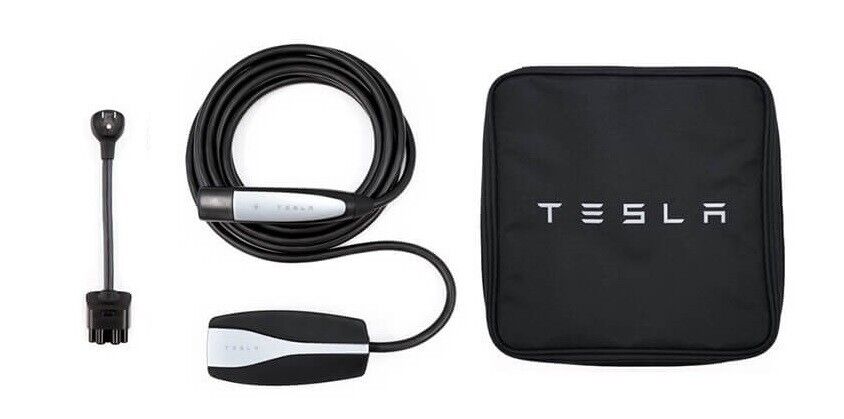
A Tesla Level 1 charger refers to the basic charging setup provided with Tesla vehicles, typically referred to as a “Mobile Connector” or “Universal Mobile Connector” (UMC). Here’s a breakdown of what it is, how it works, and its benefits:
Understanding the Basics of Level 1 Charging
A Tesla Level 1 charger consists of a standard 120-volt AC outlet adapter and a connector that plugs into the charging port of your Tesla vehicle. It’s the simplest and slowest way to charge a Tesla, but it’s also the most widely available since it uses standard household outlets.
How does it work?
- Plug and Charge: To use a Tesla Level 1 charger, you simply plug the adapter into a standard electrical outlet and connect the other end to your Tesla’s charging port. The charger converts AC power from the outlet into DC power that charges the vehicle’s battery.
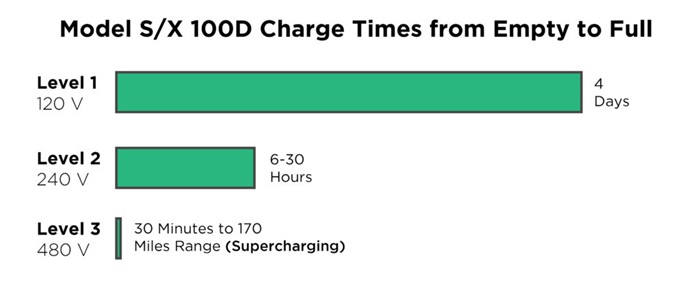
- Slow Charging Speed: Level 1 charging provides the slowest charging speed for Tesla vehicles. It typically adds around 2–5 miles of range per hour of charging, depending on the model of Tesla and other factors like battery capacity and temperature.
- Built-in Safety Features: Tesla Level 1 chargers, like other charging equipment from Tesla, come with built-in safety features such as overcurrent protection, overvoltage protection, and overtemperature protection to ensure safe and reliable charging.
Benefits of Using a Tesla Level 1 Charger
While Tesla offers faster charging options like Level 2 home chargers and Tesla Superchargers, there can still be advantages to using a Level 1 charger:
- Convenience: Since Level 1 chargers use standard household outlets, they are convenient for charging at home, at work, or anywhere with access to electrical outlets. You don’t need any special installation or equipment beyond the charger itself.
- Low Cost: Tesla Level 1 chargers are often included with the purchase of a Tesla vehicle, making them a cost-effective option for charging your car. There are no additional installation costs or fees associated with Level 1 charging.
- Flexibility: Level 1 charging allows you to top up your Tesla’s battery wherever there’s an electrical outlet, providing flexibility and peace of mind for daily driving and longer trips.
- Emergency Charging: In the event of a power outage or if you’re unable to access a higher-powered charging station, a Level 1 charger can serve as a backup option to keep your Tesla topped up.
How to Safely Use Your Tesla Level 1 Charger
There’s no actual installation required for using a Tesla Level 1 Charger since it utilizes a standard household outlet. Here’s a guide on how to safely use your Tesla Mobile Connector (which acts as your Level 1 charger):
Installation and Setup Guide
- Preparation:
- Park and Power Down: Park your Tesla in a safe and convenient location. Turn off the car and engage the parking brake.
- Locate the Charging Ports: Find the charging port on your Tesla. It’s typically located on the driver’s side in the front fender area. Refer to your owner’s manual for the exact location if unsure.
- Unlock and Open the Port: There might be a button or a latch to open the charging port cover. Consult your owner’s manual for specific instructions on your model.
- Connecting the Charger:
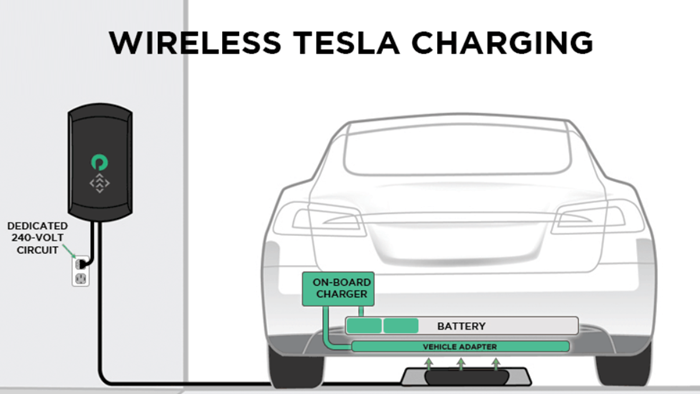
- Standard Outlet Check: Ensure the 120-volt household outlet you plan to use is in good condition and can handle the charging load. Avoid overloaded circuits or extension cords that could overheat and pose a fire hazard. Consult an electrician if you’re unsure about the outlet’s capacity or its grounding (critical for electrical safety).
- Mobile Connector Connection: Take your Tesla Mobile Connector. One end has a regular three-prong plug that you’ll plug into the approved 120-volt outlet.
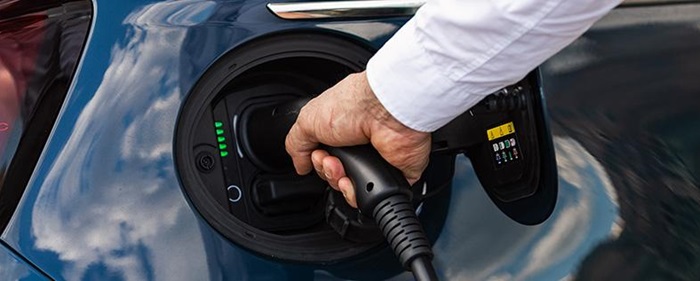
- J1772 Connector: On the other end of the Mobile Connector, you’ll find a J1772 connector. This typically fits snugly into the charging port of your Tesla. Plug the J1772 connector into your car’s charging port.
- Charging Initiation and Monitoring:
- Charging Start Up: You might hear a chime or see an indicator light on the Mobile Connector or the car’s instrument cluster to confirm a successful connection and charging initiation.
- Monitor Charging: You can monitor the charging progress through the instrument cluster or the Tesla mobile app (if your model is equipped with app connectivity).
- Disconnecting Safely:
- Unlock and Disconnect from Car: Once charging is complete, it’s recommended to unlock the car first (if it was locked) before attempting to remove the charger.
- Disconnect from Outlet: Unplug the three-prong plug from the wall outlet.
Safety Precautions When Charging
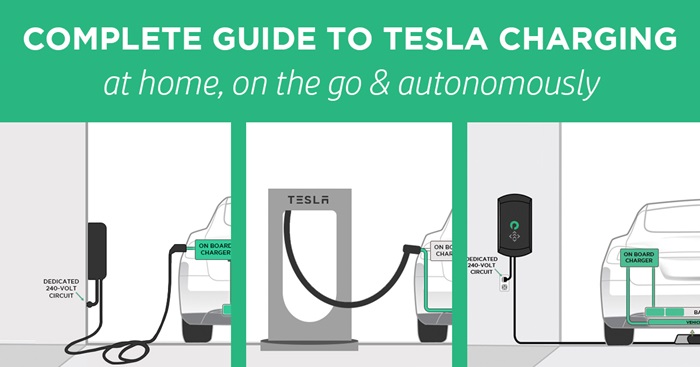
- Avoid Extension Cords: While it may be tempting to use an extension cord to reach your vehicle, it’s not recommended for Level 1 charging. Extension cords can overheat and pose a fire hazard, especially when used for prolonged periods.
- Monitor Charging: Keep an eye on the charging progress periodically, especially when charging for extended periods. This allows you to detect any abnormalities or issues early on.
- Charge in Well-Ventilated Areas: If charging indoors, ensure that the area is well-ventilated to dissipate any heat generated during charging. Avoid charging in enclosed spaces or near flammable materials.
- Keep the Charging Area Clear: Maintain a clear space around the charging outlet and cable to prevent tripping hazards and allow for proper airflow.
- Unplug When Not in Use: Disconnect the Level 1 charger from both the electrical outlet and your Tesla when not in use to prevent any potential hazards or damage.
- Follow Manufacturer’s Instructions: Refer to the user manual provided with your Tesla Level 1 charger for specific safety guidelines and recommendations from the manufacturer.
- Inspect Regularly: Periodically inspect the Level 1 charger, adapter, cable, and electrical outlet for any signs of damage or wear. Replace any components that show signs of deterioration.
Tips for Optimizing Charging Efficiency with a Tesla Level 1 Charger
Optimizing charging efficiency with a Tesla Level 1 charger involves several factors, including maximizing charging speed, monitoring and maintaining your charger, and understanding the various factors that can affect charging performance. Here are some tips to help you optimize your charging experience:
1. Maximizing Charging Speed
- Optimize Charging Time: Plug in your Tesla at night or during off-peak hours when electricity rates might be lower. This way, you can maximize the amount of charge you get for the cost.
- Preconditioning: If your Tesla model supports preconditioning, consider enabling it before charging. Preconditioning slightly warms up the battery, which can improve charging efficiency, especially in cold weather. Check your owner’s manual for specific instructions on preconditioning for your model.
2. Monitoring and Maintaining Your Charger
- Tesla Mobile App: Utilize the Tesla mobile app (if your model is equipped) to monitor charging progress remotely. The app can also provide notifications when charging is complete.
- Visual Inspection: Regularly inspect the Tesla Mobile Connector for any signs of damage to the cable or connectors. Don’t use a damaged charger; get it replaced if necessary.
3. Understanding Factors Affecting Charging Performance
- Ambient Temperature: Extreme temperatures (hot or cold) can affect charging speed. Ideally, charge your Tesla in a temperature-controlled environment whenever possible. Garage charging is usually recommended.
- Outlet Capacity: Ensure you’re using a 120-volt outlet with sufficient capacity to handle the charging load. Avoid overloaded circuits or extension cords that can limit charging speed and pose safety risks.
- Battery Health: Over time, battery health can slightly degrade, which can impact charging efficiency. However, modern Tesla batteries are designed for longevity, and this effect shouldn’t be significant unless the battery has experienced extreme conditions or extensive fast charging cycles.
Common Issues and Troubleshooting with Tesla Level 1 Chargers
While the Tesla Mobile Connector (essentially acting as your Level 1 charger) is generally reliable, occasional issues can arise. Here’s how to troubleshoot common problems:.
Dealing with Charging Interruptions
Charging might stop unexpectedly, or the indicator light on the Mobile Connector behaves abnormally. Causes may be due to loose connections, overloaded circuits, overheating, or temporary power outages.
Troubleshooting Steps:
- Check Connections: Ensure both the plug is secure in the wall outlet and the J1772 connector is firmly plugged into your Tesla’s charging port.
- Circuit Breaker Trip: If a circuit breaker tripps due to overload, reset it (after ensuring nothing else is on the circuit that could overload it again).
- Mobile App Check: If your Tesla has app connectivity, check the app for any error messages that might provide clues about the cause of the interruption.
- Outlet Test: Try plugging the Mobile Connector into a different outlet to see if the issue persists. This can help isolate the problem from the original outlet.
- Overheating: If the Mobile Connector feels hot to the touch, unplug it and let it cool down before restarting the charge. Avoid charging in excessively hot environments.
Addressing Connectivity Problems
The car might not recognize the charger, or charging doesn’t initiate. The cause may be a faulty mobile connector, a dirty or damaged connector pin, or a software malfunction in the car’s system.
Troubleshooting Steps:
- Restart the car: A simple car restart can sometimes resolve minor software glitches. Try turning off the car completely, waiting a few seconds, and then powering it back on.
- Clean the Connector Pins: Use a can of compressed air to gently clean any dust or debris from the connector pins on both the Mobile Connector and your Tesla’s charging port.
- Try a Different Outlet: Plug the Mobile Connector into a different outlet to rule out outlet-related issues.
- Mobile Connector Check: If the problem persists across different outlets, the Mobile Connector itself might be faulty. Contact Tesla support for a replacement.
Additional Tips:
- Consult the Manual: Your Tesla owner’s manual might have specific troubleshooting steps for various charging issues with the Mobile Connector.
- Tesla Support: If you’ve exhausted these troubleshooting steps and the problem remains unresolved, contact Tesla Support for further assistance.
While not as fast as its higher-level counterparts, the Level 1 charger remains a reliable and convenient tool for everyday charging. By understanding its capabilities and implementing optimization strategies, you can unlock its full potential and ensure your Tesla is always ready for the road ahead.

Henry Michael is a leading expert in EV charging station research, specializing in innovative solutions for electric vehicle infrastructure. With a passion for sustainability and technological advancement, he is dedicated to advancing the accessibility and efficiency of EV charging worldwide.
